Honda Prelude H22A Fan Switch: Simple Replacement Tips

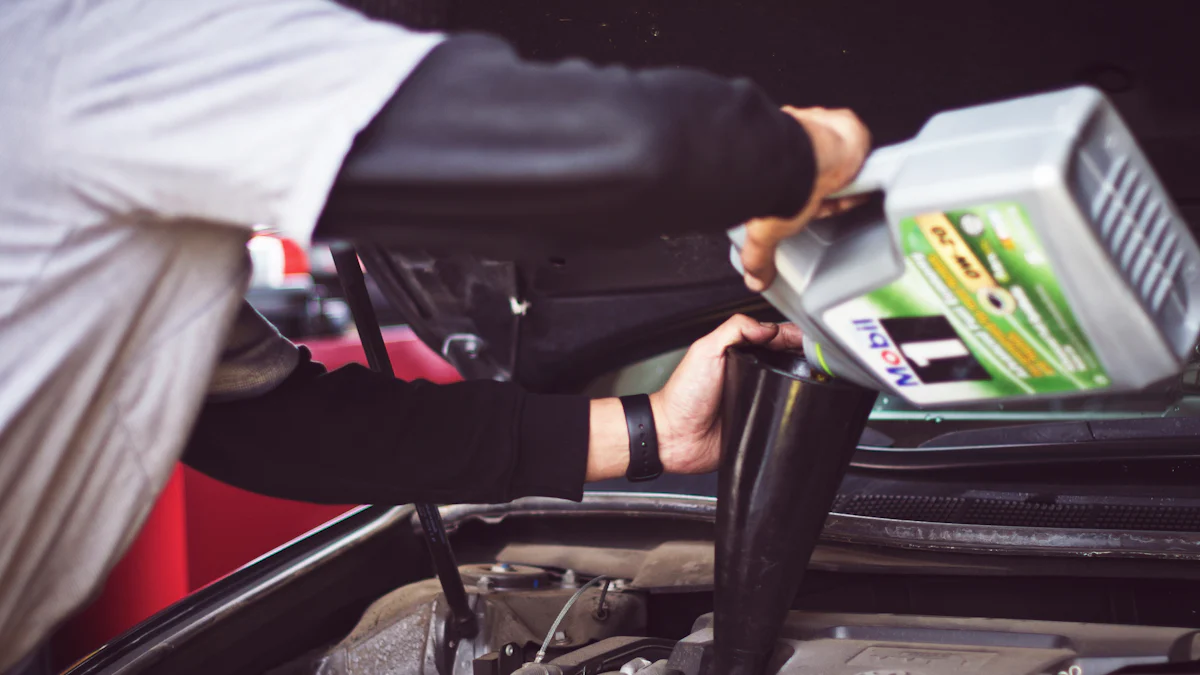
The cooling fan switch plays a crucial role in maintaining engine temperature. A malfunctioning switch can lead to overheating, causing severe damage. Recognizing symptoms of a faulty switch is essential. Common signs include the fan not activating or running continuously. Immediate attention prevents costly repairs. Understanding the Honda Prelude H22A cooling fan switch location aids in quick diagnostics and replacement. Regular checks ensure optimal performance and longevity.
Tools and Safety Precautions
Necessary Tools
List of tools required
Replacing the Honda Prelude H22A fan switch requires specific tools. A socket set is essential for loosening bolts. A wrench set helps with tight spaces. Pliers are useful for gripping and removing connectors. A coolant drain pan prevents spills during the process.
Where to purchase tools
Automotive stores like AutoZone or Advance Auto Parts offer these tools. Online platforms such as Amazon provide a wide selection. Ensure that tools meet quality standards for durability and efficiency.
Safety Precautions
Disconnecting the battery
Disconnect the battery to prevent electrical hazards. Remove the negative terminal first. This step ensures safety during the replacement process.
Draining the coolant
Draining the coolant avoids spills and potential burns. Use a drain pan to collect the coolant. Proper disposal follows environmental guidelines.
Honda Prelude H22A Cooling Fan Switch Location
Identifying the Fan Switch
The cooling fan switch serves as a critical component in the Honda Prelude H22A's engine management. A visual inspection helps in identifying the switch. The switch typically appears as a small, cylindrical sensor with a connector attached. The Honda Prelude H22A cooling fan switch location is often found near the thermostat housing or along the upper radiator hose housing. These areas provide easy access for maintenance and replacement.
Accessing the Fan Switch
Access to the fan switch requires removing any obstructions within the engine bay. Components such as air intake ducts or hoses might block the path. Carefully detach these parts to reach the switch without causing damage. Ensuring safe access involves using appropriate tools and techniques. A clear workspace minimizes the risk of accidental injury or component damage. Proper lighting and a clean environment further enhance visibility and precision during the replacement process.
Removing the Faulty Fan Switch
Step-by-Step Removal
Loosening connections
The removal process begins with loosening the connections around the faulty fan switch. A socket wrench proves invaluable for this task. Carefully apply the wrench to the bolts securing the switch. Ensure a firm grip to prevent slippage. Gradually turn the wrench counterclockwise. This motion releases the tension on the bolts. Maintain a steady hand to avoid damaging adjacent components.
Expert Testimony:
"Finding the correct fan switch plug will help diagnose the fan control issue as well." - Anonymous User, Automotive Repair
This advice underscores the importance of identifying the right connections. Proper identification ensures a smooth removal process.
Safely removing the switch
Once the connections loosen, proceed to remove the fan switch. Gently pull the switch away from its housing. Avoid applying excessive force. Excessive force risks breaking the connector or surrounding parts. Use pliers if necessary to grip the switch securely. Ensure a clean extraction by maintaining a straight pull.
Expert Testimony:
"Try swapping the switch, or disconnect the plug from the switch, jump it with a paperclip and see if the fan comes on." - Anonymous User, Automotive Repair
This method serves as a preliminary test for switch functionality. A successful test confirms the need for replacement.
Completing these steps prepares the area for installing a new fan switch. Proper removal techniques safeguard the integrity of the engine bay.
Installing the New Fan Switch
Preparing the New Switch
Checking compatibility
Ensure the new Cooling Fan Switch matches the specifications of the Honda Prelude H22A. Verify the part number and design to confirm compatibility. A correct match guarantees optimal performance and prevents future issues.
Pre-installation checks
Inspect the new switch for any visible defects. Confirm that connectors and terminals are intact. A thorough check ensures a smooth installation process and reliable operation.
Step-by-Step Installation
Securing the new switch
Position the new fan switch in its designated location. Align it properly with the mounting points. Use a socket wrench to tighten the bolts securely. Proper alignment ensures effective functioning and stability.
Reconnecting components
Reconnect all electrical connectors to the new switch. Ensure each connection is firm and secure. Restore any removed components, such as hoses or ducts, to their original positions. This step completes the installation and prepares the system for testing.
Testing the New Fan Switch
Initial Testing
Reconnecting the battery
Reconnecting the battery is the first step in testing the new fan switch. Attach the negative terminal securely. Ensure a firm connection to prevent electrical issues. A stable power supply is crucial for accurate testing.
Running the engine
Start the engine to initiate the testing process. Observe the cooling fan's operation closely. The fan should activate at the appropriate temperature. Monitor the engine temperature gauge for any irregularities. Proper fan function indicates successful installation.
Troubleshooting
Fan not activating
If the fan does not activate, further investigation is necessary. Begin by checking the fan switch connections. Ensure all connectors are properly attached. Loose connections can prevent the fan from operating.
Consider this practical approach: Unplug the two-wire connector at the fan motor. Connect temporary wires to the fan terminals. Touch these wires directly to the battery terminals. If the fan spins, the issue lies elsewhere in the circuit.
Checking connections
Inspect all related connections for continuity. Verify that the wiring harness is intact. Damaged wires can disrupt the fan's operation. Use a multimeter to test for electrical continuity. An open circuit may indicate a break in the wiring. Addressing these issues ensures reliable fan performance.
Additional Maintenance Tips
Regular Checks
Monitoring fan operation
Regularly monitor the cooling fan's operation to ensure optimal performance. Observe the fan's activation and deactivation cycles. A properly functioning fan will activate when the engine reaches a specific temperature. Consistent monitoring helps identify any irregularities early. Early detection prevents potential overheating issues.
Inspecting related components
Inspect related components such as the thermostat and radiator hoses. These components directly affect the cooling system's efficiency. Check for any signs of wear or damage. Replace any faulty parts promptly to maintain the system's integrity. Regular inspections extend the lifespan of the cooling system.
When to Seek Professional Help
Persistent issues
Seek professional help if persistent issues arise despite regular maintenance. A professional mechanic can diagnose complex problems accurately. Persistent fan activation or failure to activate indicates deeper issues. Professional intervention ensures a thorough examination and resolution.
Complex diagnostics
Complex diagnostics may require specialized tools and expertise. Professionals possess the necessary equipment for in-depth analysis. Attempting complex diagnostics without proper knowledge risks further damage. Trusting a professional guarantees accurate assessments and effective solutions.
Unknown User: "Thanks for the information and it was very helpful. The fan switch was on the block and not by the radiator. Just gonna manually run the fan with a switch."
This testimonial highlights the importance of understanding fan switch locations and functions. Proper knowledge aids in effective troubleshooting and maintenance.
Common Mistakes to Avoid
Incorrect Installation
Misalignment Issues
Misalignment often occurs during fan switch installation. Proper alignment ensures optimal performance. Verify the position of the switch before securing it. Misaligned switches can lead to improper fan operation. Always double-check the alignment to prevent issues.
Over-tightening
Over-tightening can damage the fan switch. Use a torque wrench to apply the correct pressure. Excessive force may crack the switch or its housing. Follow manufacturer guidelines for torque specifications. Careful handling preserves the integrity of the components.
Ignoring Safety Precautions
Risks of Not Draining Coolant
Failing to drain coolant poses significant risks. Coolant spills can cause burns and environmental harm. Always use a drain pan to collect the coolant. Proper disposal follows environmental regulations. This step ensures safety and compliance.
Battery-Related Hazards
Battery disconnection prevents electrical hazards. Always remove the negative terminal first. This precaution avoids short circuits and potential shocks. Securely reconnect the battery after completing the installation. Safe practices protect both the vehicle and the technician.
FAQs About Fan Switch Replacement
Common Questions
How often to replace
Owners often ask about the replacement frequency for the fan switch. Regular inspections help determine the need for replacement. A faulty switch may require immediate attention. Consider replacing every 50,000 miles as a general guideline.
Cost considerations
Cost is a common concern for many. The price of a fan switch varies by brand and model. Expect to spend between $20 and $50 for the part. Labor costs increase the total if professional installation is chosen.
Expert Answers
Professional insights
Experts emphasize the importance of quality parts. Using OEM parts ensures compatibility and reliability. Professionals also recommend regular system checks to prevent issues. Proper maintenance extends the lifespan of the cooling system.
DIY tips
DIY enthusiasts find fan switch replacement manageable. Ensure all tools are ready before starting. Follow safety precautions to avoid accidents. Online tutorials provide valuable guidance for first-time replacements.
Replacing the Honda Prelude H22A fan switch involves straightforward steps. Follow each step carefully to ensure a successful DIY maintenance experience. Regular checks and proactive replacements prevent costly repairs. Always prioritize safety by disconnecting the battery and draining coolant. Many enthusiasts on forums have shared valuable insights, emphasizing the importance of understanding fan switch locations and functions. Embrace the satisfaction of maintaining your vehicle while ensuring optimal performance.
Brand Introduction: X-HON Fans
At X-HON Fans, we are a seasoned manufacturer with a focus on the production of cooling fans. Our products are widely recognized and utilized in a variety of industries, including lighting, wine cabinets, automotive cooling systems, welding machinery, and beyond. We specialize in the manufacturing of DC brushless fans, AC fans, dustproof guards, compact cooling fans, and industrial fans. We have achieved ISO9001 international quality system certification, and our products have been endorsed by certifications such as ROHS, TUV CE, FCC, SGS, and UL test reports. Our fans are integral to the operations of computers, communication devices, consumer electronics, automotive electronics, HVAC systems, and building automation.
We are committed to the production of high-performance cooling fans, providing both standard and tailored solutions to meet the specific needs of our clients. We offer sample testing to ensure that our products meet the highest standards of quality and reliability. Additionally, we are now pleased to provide IP68-rated waterproof fans across our entire product line, catering to the efficient and stable cooling requirements in complex environments.
See Also
Analyzing PowerHobby Cooling Fans: A Detailed Comparison
Effective Cooling Fan Options for Personal Computers
Optimizing DC Blower Fan Performance: 4 Helpful Tips
About US
X-HON
X- HON is a leading manufacturer of cooling fans,speciaizing in research, development, and production forover a decade. With a focus on quaity and inovation, we ofer arange of cooling solutions to global markets, ensuring superior performance and reliable service.
Address
Address1: HuaYuan Building, Xixiang Avenue, Bao'anDistrict, Shenzhen, Guangdong Province, china;
Address2: DaLingShan District, DongGuan,Guangdong Province, china
Contacts
frelin.jiang@x-hon.com
bella.cai@x-hon.com
+86 15626528321
To inquire about product specifications or to request custom fan designs,
please leave your email address.
Our dedicated service team will be in contact with you shortly.